> For the complete documentation index, see [llms.txt](https://docs.ox.security/llms.txt). Markdown versions of documentation pages are available by appending `.md` to page URLs; this page is available as [Markdown](https://docs.ox.security/api-documentation/api-reference/model-context-protocol/mcp-integration-using-oauth.md).
# MCP Integration Using OAuth
This guide explains how to connect your IDE or AI coding tool to OX Security by using the OX MCP server and your OX Security account.
The first time your tool connects, sign in to your OX Security account in your browser instead of creating an MCP Integration Key.
You can use this guide to configure:
* [Cursor with OX MCP](#integrating-cursor-with-ox-mcp)
* [Claude Desktop with OX MCP](#integrating-claude-desktop-with-ox-mcp)
* [Claude Code with OX MCP](#integrating-claude-code-with-ox-mcp)
* [Visual Studio Code with OX MCP](#integrating-visual-studio-code-with-ox-mcp)
The OX MCP server URL is:
> **Note:** Browser sign-in is available only with the SaaS OX MCP server. If you use an on-premises deployment, authenticate by using an MCP Integration Key instead. For instructions, see [**MCP Integration Guide using an MCP Integration Key**](/api-documentation/api-reference/model-context-protocol/mcp-integration-guide.md).
## Log into OX Security
The following login process is applicable to any tool used with this integration method.
1. Log in to OX if you are not already signed in.
> **Note:** If your organization requires SSO, sign in using your enterprise email address.
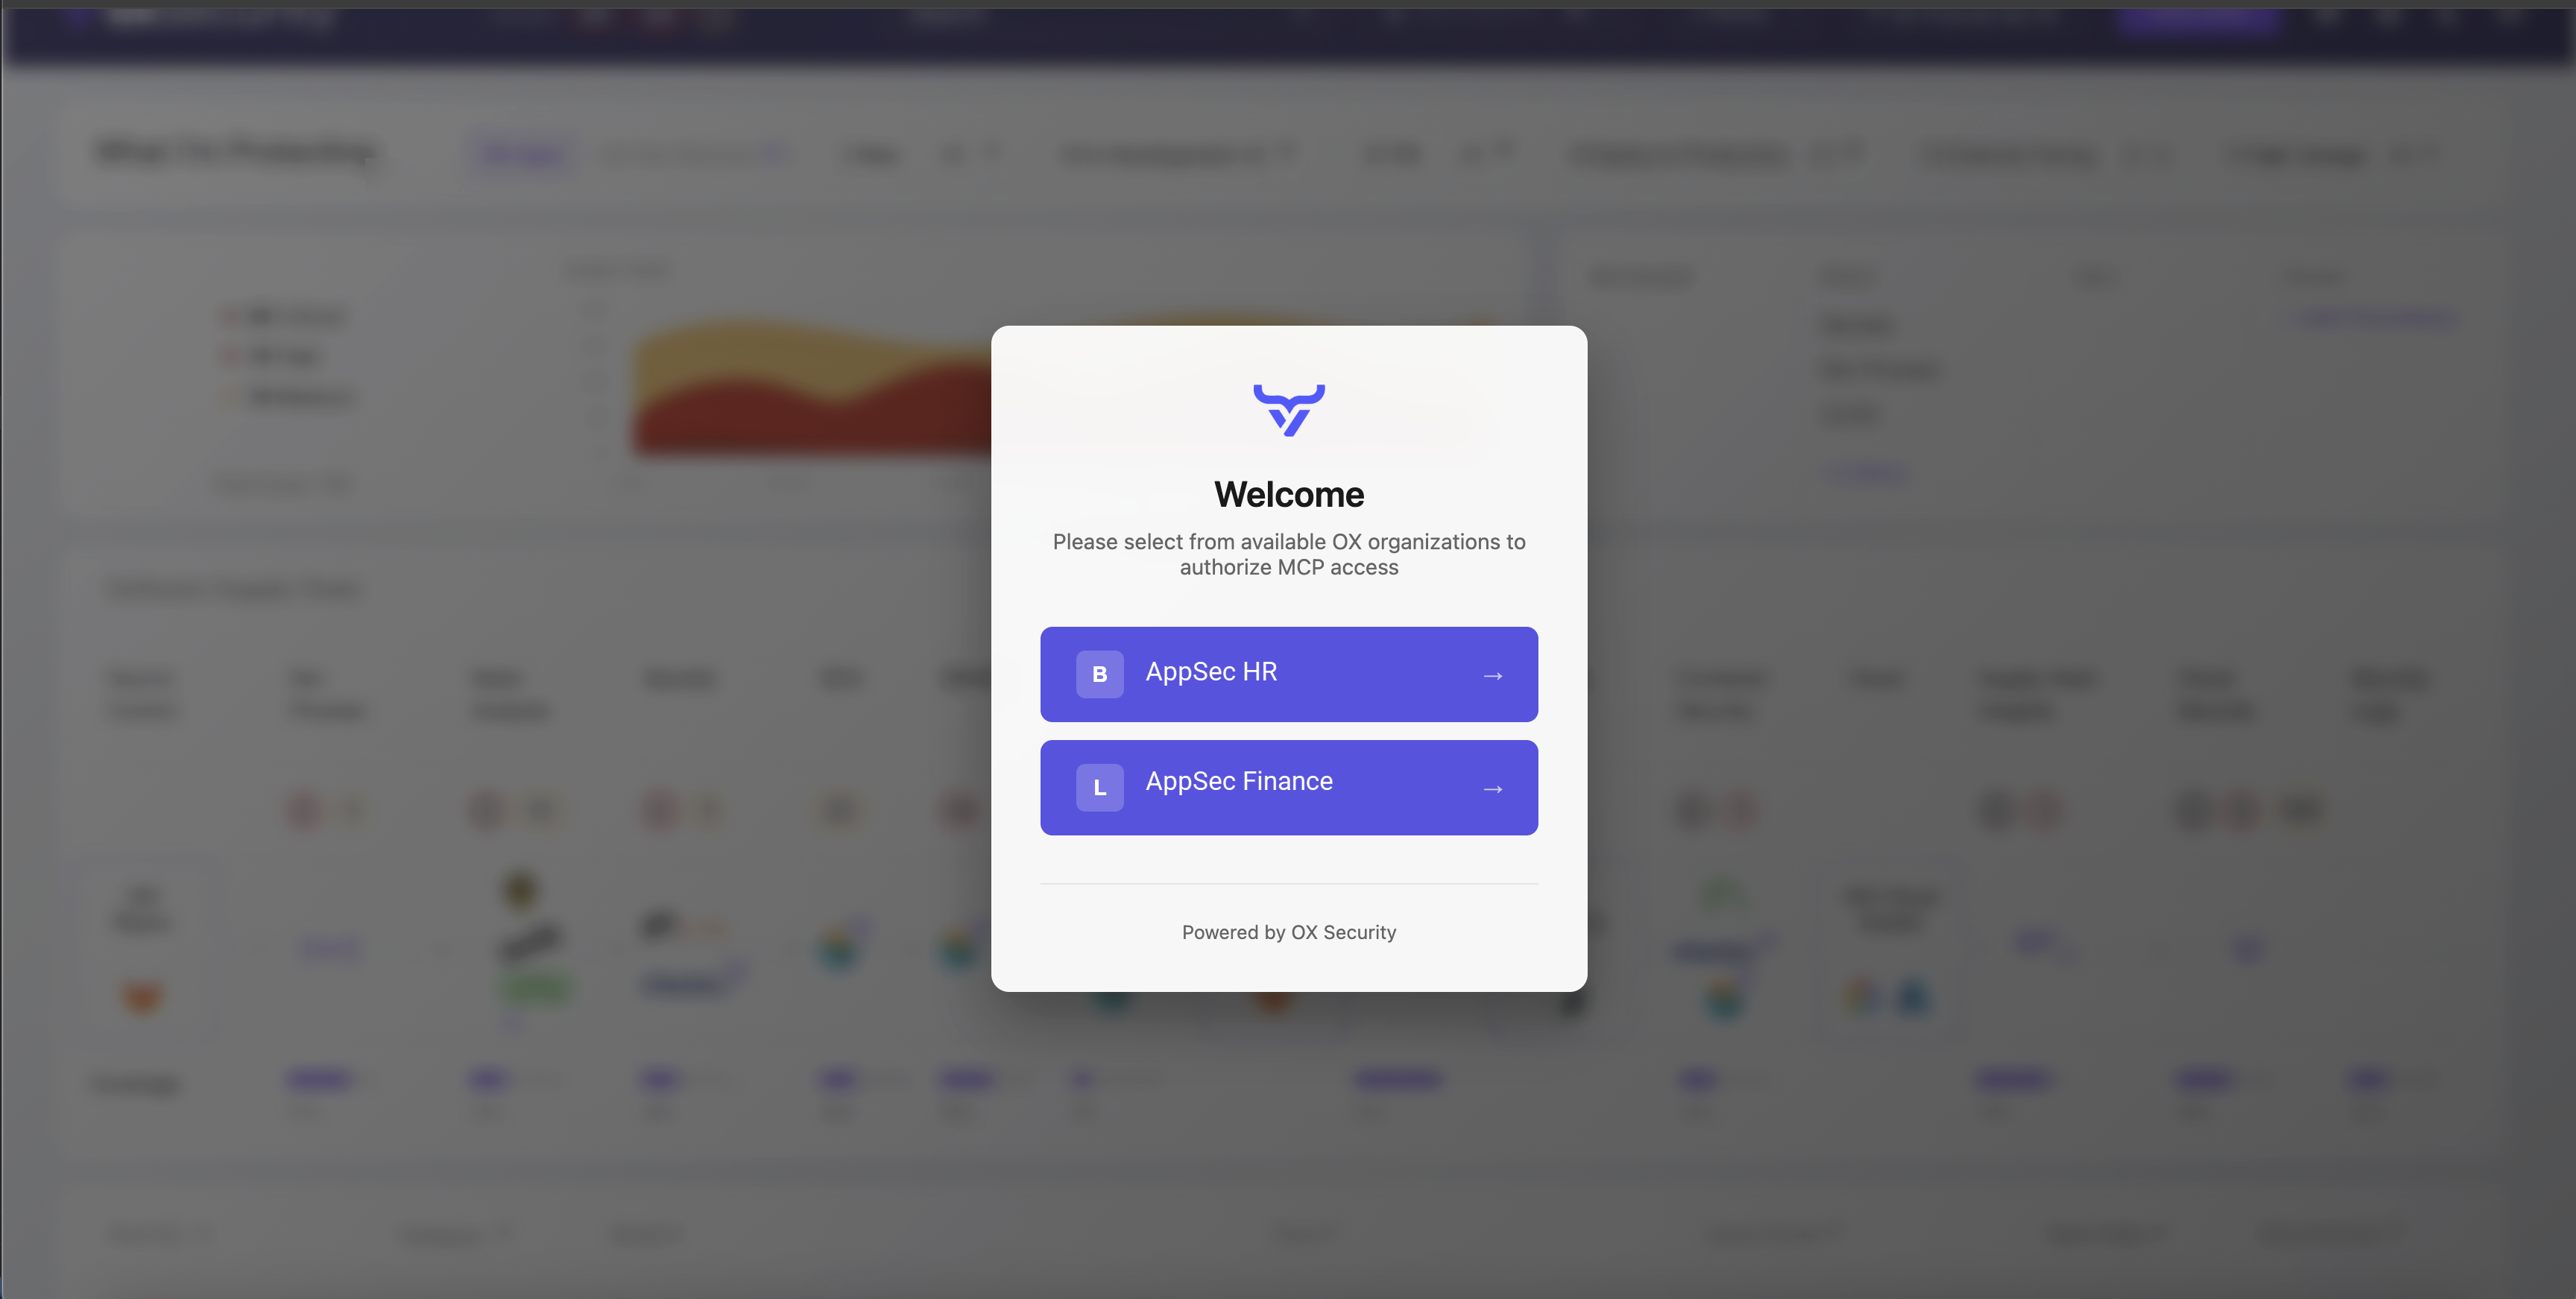
2. Select the OX organization to authorize MCP access for.
> **Note:** If you belong to a single OX organization only, it is selected automatically, and this step is skipped.
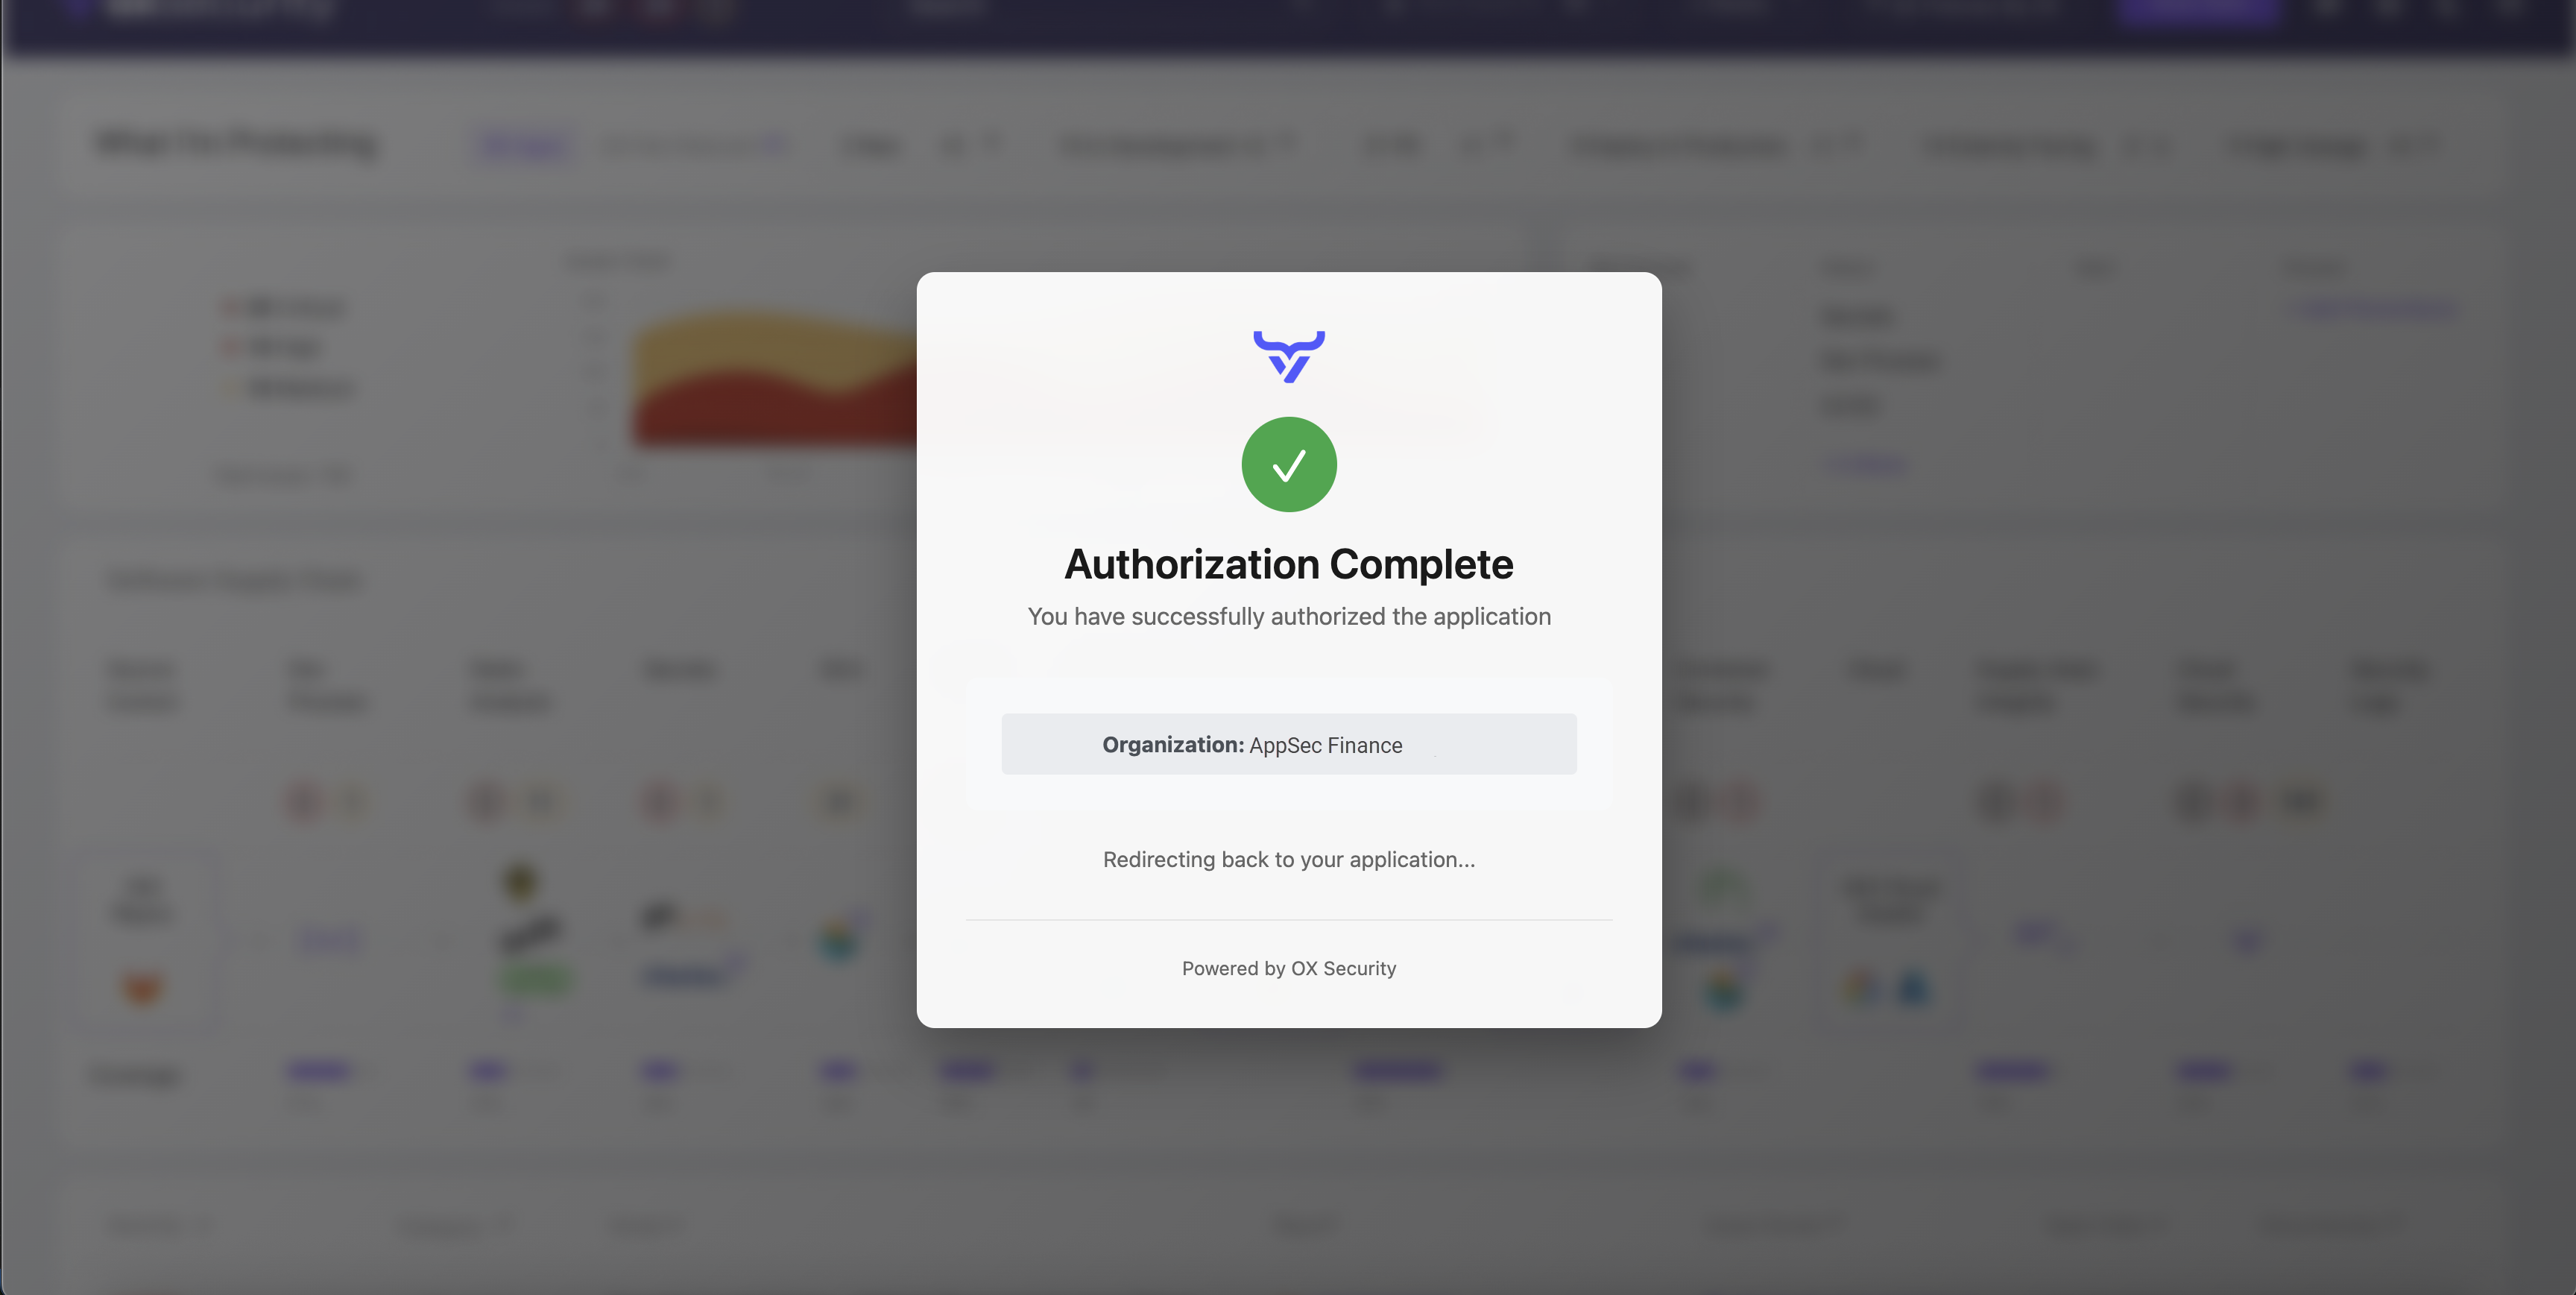
The **Authorization Complete** message appears, and you are redirected back to your IDE or AI coding tool; OX Security now appears as a connected MCP server.
## Supported MCP clients and gateways
To protect the OAuth sign-in flow, OX accepts browser sign-in only from MCP clients and gateways with recognized OAuth callback URLs. This prevents authorization codes from being redirected to unauthorized sites.
The following clients and gateways are supported without additional configuration:
* Claude Desktop, Claude Code, and Claude on the web
* Visual Studio Code, including VS Code Insiders
* Cursor for web and desktop
* ChatGPT custom connectors
* Perplexity standard and enterprise custom connectors
* Cequence AI Gateway
* Locally running IDE, CLI, and agent clients that complete sign-in using a local callback address on your machine
If you use a different MCP client, gateway, or broker, contact OX Technical Support and provide the client name and OAuth callback URL. OX can enable the callback URL for your organization.
## Integrating Cursor with OX MCP
By integrating with OX's MCP, Cursor becomes a security-aware development assistant, able to query live security data, suggest actions, and triage issues directly from your IDE.
**To integrate Cursor with OX MCP:**
1. Click [here](cursor://anysphere.cursor-deeplink/mcp/install?name=ox-security\&config=eyJ1cmwiOiJodHRwczovL21jcC5hcHAub3guc2VjdXJpdHkvIn0%3D) to open Cursor in the relevant location where you can start working.
2. Select **Install**. No token or header configuration is required.
In the Cursor MCP settings, the **ox-security** server appears with a **Needs authentication** indication.
3. Select **Connect**.
The browser opens the OX Security authorization page.
4. Complete the login as described in [Logging in to OX Security](#logging-in-to-ox-security).
After logging in, the OX Security logo appears in the Cursor tools menu with the list of available tools. For more info, refer to [Cursor Documentation](https://docs.cursor.com/en/tools/developers).
## Integrating Claude Desktop with OX MCP
Claude Desktop connects to the OX MCP server as a custom connector, providing teams with robust security capabilities directly from their desktop environment. No local configuration file is required.
**To integrate Claude Desktop with OX MCP:**
1. In Claude Desktop, go to **Settings** > **Connectors**.
2. Select **Add custom connector**.
3. Set a name (for example, **OX Security**) and the URL:
```
https://mcp.app.ox.security/
```
4. Select **Add**.
5. Open the new OX Security connector and select **Connect**.
The browser opens the OX Security authorization page.
6. Complete the login as described in [Log into OX Security](#log-into-ox-security).
After authorization, OX Security tools are available in Claude Desktop conversations through the tools menu.
7. Review and adjust what Claude is allowed to do with each OX Security tool under **Settings** > **Connectors** > **OX Security** > **Tool permissions**.
### Integrating Claude Code with OX MCP
Claude Code, Anthropic's agentic coding tool for the terminal, connects to the OX MCP server directly from the command line, allowing developers to query live security data, triage issues, and get remediation guidance without leaving their coding session.
> **Note:** Ensure Claude Code is installed and up to date. To check your version, run `claude --version`; to update, run `claude update`.
**To integrate Claude Code with OX MCP:**
1. Open a terminal and run the following command:
```bash
claude mcp add --transport http ox-security https://mcp.app.ox.security/
```
2. Start Claude Code:
```bash
claude
```
3. Run the `/mcp` command, select **ox-security** (shown with a **needs authentication** status), and choose **Authenticate**.
The browser opens the OX Security authorization page.
4. Complete the login as described in [Log into OX Security](#log-into-ox-security).
5. Return to the terminal. The `/mcp` menu now shows **ox-security** with a **connected** status, along with the OX Security tools available to Claude Code.
By default, the server is added only for the current project directory. To make it available in all of your projects, add `--scope user` to the command in step 1.
## Integrating Visual Studio Code with OX MCP
Visual Studio Code provides versatile options to connect with OX Security's MCP, enabling developers to streamline their security workflows within the VS Code ecosystem.
**To integrate VS Code with OX MCP:**
1. Open **VS Code Settings**.
2. Open **MCP User Configuration**, see [VS Code MCP Docs](https://code.visualstudio.com/docs/copilot/chat/mcp-servers) for details.
3. Add the JSON MCP server configuration for OX Security in `mcp.json`:
```json
{
"servers": {
"ox-security": {
"type": "http",
"url": "https://mcp.app.ox.security/"
}
}
}
```
4. Save the configuration and start the server. When VS Code prompts that the MCP server requires authentication, select **Allow**.
The browser opens the OX Security authorization page. complete the login as described in [Log into OX Security](#log-into-ox-security).
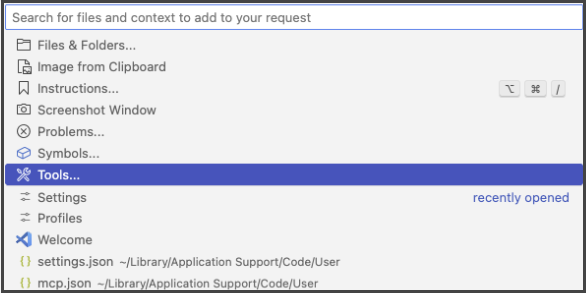
5. In the **VS Code chat**, click **Add Context**.
6. Select the desired tools.
OX Security appears as an available MCP server.
## Troubleshooting
Sign-in fails with "rejected the redirect URI" or `invalid_redirect_uri`
#### Symptoms
Your MCP client or gateway fails to register with the OX MCP server and displays an error similar to one of the following:
```
Dynamic Client Registration failed: The MCP server rejected the redirect URI (...)
```
```
{"error":"invalid_redirect_uri","error_description":"One or more redirect_uris are not permitted by this authorization server"}
```
#### Cause
The OAuth callback URL provided by the MCP client or gateway is not recognized by OX. OX allows authorization codes to be redirected only to approved callback URLs.
#### Resolution
To resolve the callback URL error:
1. Check whether your client is listed in the supported MCP clients and gateways.
2. If your client is not listed, contact OX Technical Support and provide:
* The name and version of the MCP client, gateway, or broker.
* The full OAuth callback URL shown in the error message.
* Whether the callback URL is shared by all customers of the provider or is specific to your organization.
3. After OX reviews and approves the callback URL, retry the sign-in flow.
No additional configuration is required on your side after the callback URL is enabled.
If you cannot connect your MCP client or provider to OX MCP for another reason, contact OX Technical Support and provide the client name and the error message.
---
# Agent Instructions
This documentation is published with GitBook. GitBook is the documentation platform designed so that both humans and AI agents can read, navigate, and reason over technical content effectively. Learn more at gitbook.com.
## Querying This Documentation
If you need additional information that is not directly available in this page, you can query the documentation by asking a question.
Perform an HTTP GET request on the following URL with the `ask` and `goal` query parameters:
```
GET https://docs.ox.security/api-documentation/api-reference/model-context-protocol/mcp-integration-using-oauth.md?ask=&goal=
```
`ask` is the immediate question: it should be specific, self-contained, and written in natural language.
`goal` is what the user is ultimately trying to achieve, the reason they need the answer. Sharing it helps GitBook give you a better, more relevant answer. A goal is most helpful when it describes the outcome the user wants rather than restating the question. For example, with `ask=how do I create an API token`, a goal like `automate deployments from our CI pipeline` lets GitBook tailor the answer to that use case.
The response will contain a direct answer to the question and relevant excerpts and sources from the documentation.
Use this mechanism when the answer is not explicitly present in the current page, you need clarification or additional context, or you want to retrieve related documentation sections.
.png?alt=media)
.png?alt=media)
.png?alt=media)


.png?alt=media)