# Microsoft Teams (combined)

## Introduction

Integrate Microsoft Teams (Teams) with OX to receive real-time security alerts, incident updates, and workflow notifications directly in MS Teams channels.

This integration streamlines incident management, reduces response time, enhances team collaboration, and enables you to:

* [Send a Teams message about an issue](#send-a-teams-message-about-an-issue)
* [Add a Teams message to a workflow](#add-teams-messages-to-workflows)

## Connection methods

For general information about connection methods, see[ Connection methods](/get-started/onboarding-to-ox/source-control/connection-methods.md).

To connect Teams to OX, use one of the following two connection methods:

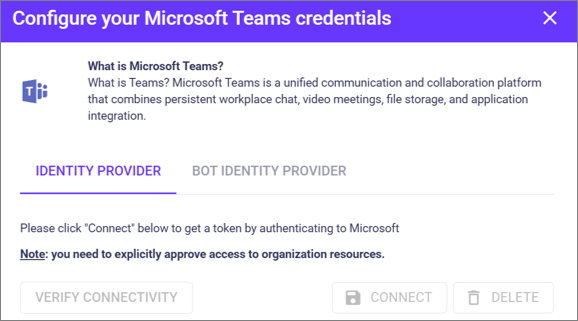
* **Identity provider:** OX sends notifications using your individual Microsoft user identity. You connect by authenticating to Microsoft directly from OX.
* **Bot identity provider:** Sends Teams notifications from a unified "OX Security" app identity instead of individual user accounts. This method centralizes deployment via Teams policies and provides direct links from notifications to OX issues and workflows.

## Permission scopes

OX requests the Microsoft Graph and OpenID Connect permissions for the Microsoft Teams integration. OX declared these permissions when it registered its application in Azure. Microsoft grants the permissions when you connect and complete the Microsoft consent flow.

<table><thead><tr><th width="203.33331298828125" valign="top">Permissions (A-Z)</th><th width="507.86669921875" valign="top">Description</th></tr></thead><tbody><tr><td valign="top">Channel.ReadBasic.All</td><td valign="top"><p>Reads basic channel properties (name, description, type).</p><p>Allows OX to select a channel when sending notifications. OX lists channels inside the selected team to populate the UI so messages are sent to the correct channel.</p></td></tr><tr><td valign="top">ChannelMessage.Send</td><td valign="top">Sends messages to team channels (both standard and private). Required to permit OX to send security alerts and notifications to your selected Teams channels.</td></tr><tr><td valign="top">Chat.Create</td><td valign="top">Creates new 1:1 or group chats for private notifications when no existing conversation exists.</td></tr><tr><td valign="top">Chat.ReadWrite</td><td valign="top">Reads and sends messages in chats where the app participates, including 1:1 and group notifications.</td></tr><tr><td valign="top">offline_access</td><td valign="top">Maintains persistent connection to Teams without requiring users to repeatedly sign in. Enables OX to automatically renew expired access tokens so notifications and integrations continue working uninterrupted.</td></tr><tr><td valign="top">openid</td><td valign="top">Enables Microsoft sign-in and single sign-on (SSO) so users can authenticate and connect their Teams environment to OX using their work account credentials.</td></tr><tr><td valign="top">Team.ReadBasic.All</td><td valign="top">Reads team and channel names and IDs for channel notification configuration. Requires admin consent.</td></tr><tr><td valign="top">User.Read</td><td valign="top">Reads signed-in user profile (name, email, ID) to identify connected user and list joined teams</td></tr><tr><td valign="top">User.Read.All</td><td valign="top">Reads basic profile information for all organization users to enable notification recipient selection and 1:1 chat resolution. Requires admin consent.</td></tr></tbody></table>

## Prerequisites

<table><thead><tr><th width="180.73333740234375" valign="top">Connection method</th><th width="234.133056640625" valign="top">OX</th><th width="316.60015869140625" valign="top">Microsoft Teams</th></tr></thead><tbody><tr><td valign="top">Identity provider</td><td valign="top">Permission to<br>configure connectors</td><td valign="top"><ul><li>Microsoft Teams account</li><li>(Optional) Administrative access to Microsoft Azure Admin Center</li><li>Permissions to manage enterprise applications in Azure</li></ul></td></tr><tr><td valign="top">Bot identity provider</td><td valign="top">Permission to<br>configure connectors</td><td valign="top"><ul><li>Microsoft Teams account</li><li>Microsoft Teams admin with permission to manage apps and policies in the Teams Admin Center</li></ul></td></tr></tbody></table>

## Connect with Identity Provider

1. Verify that the prerequisites are in place.
2. In the OX app, go to **Connectors > Dev Alerts > Microsoft Teams** and select **IDENTITY PROVIDER**.<br>

   <div align="left"><figure><img src="/files/NNtC2ushOPSm3zisB2EY" alt=""><figcaption></figcaption></figure></div>
3. Select **CONNECT**. The Microsoft Teams connector is configured.
4. When prompted, you will be asked to approve access to organization resources. For the list of permissions, see the section [Permission Scopes.](#permission-scopes)\
   \
   ![](/files/V8v9VBci55rmWg21HXkE)<br>
5. Select **Accept**.

## Connect with the Bot Identity Provider

### Step 1: Connect to OX \[OX]

1. Verify that the prerequisites are in place.
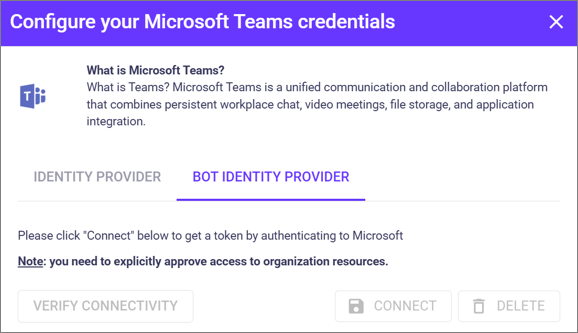
2. In OX, go to **Settings > Connectors > Dev Alerts > Microsoft Teams** and select **BOT IDENTITY PROVIDER**.<br>

   <div align="left"><figure><img src="/files/Va1XQDtgezdIJw04jFjs" alt=""><figcaption></figcaption></figure></div>
3. In Configure your Microsoft Teams credentials, select **CONNECT**.
4. When prompted, you will be asked to approve access to organization resources. For the list of permissions, see the section [Permission scopes](#permission-scopes).\
   \
   ![](/files/9uK8RTx0nwV24eocx5ZG)<br>
5. Complete the Microsoft consent flow, then return to OX and confirm that the connector shows **Connected**.

### Step 2: Publish the OX Security app to your Teams tenant \[Microsoft]

1. Verify that the prerequisites are in place.
2. Go to the **Teams Admin Center**.
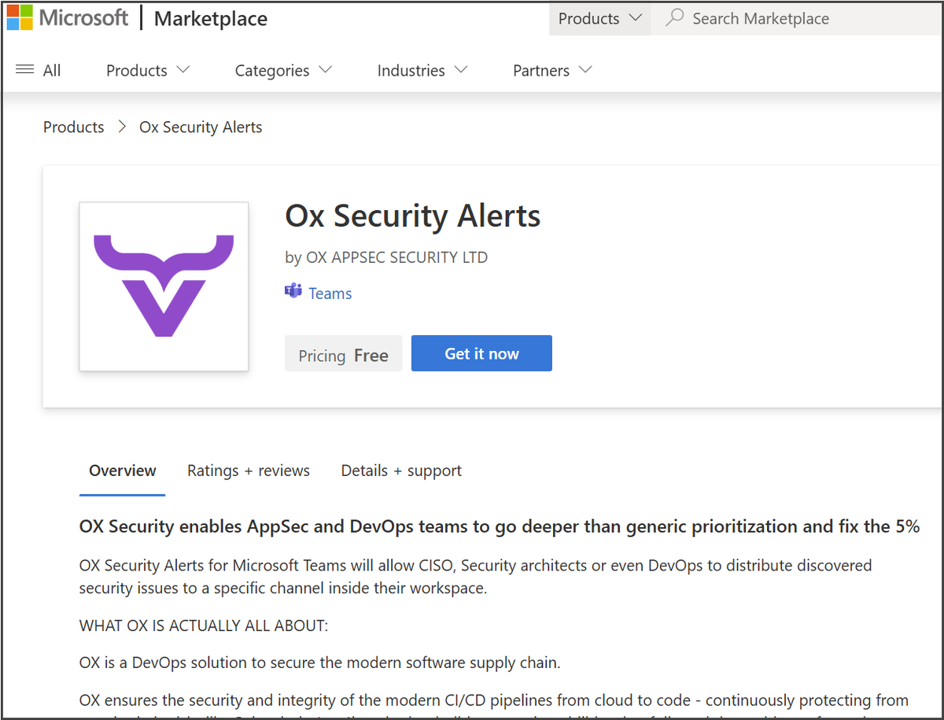
3. Go to **Teams apps > Manage apps**. Search for OX Security and open the app from the Azure Marketplace.<br>

   <div align="left"><figure><img src="/files/buLBITQN3wjKA5EdTGUz" alt="" width="375"><figcaption></figcaption></figure></div>
4. If your policies require it, set the app to **Allowed for your organization**.
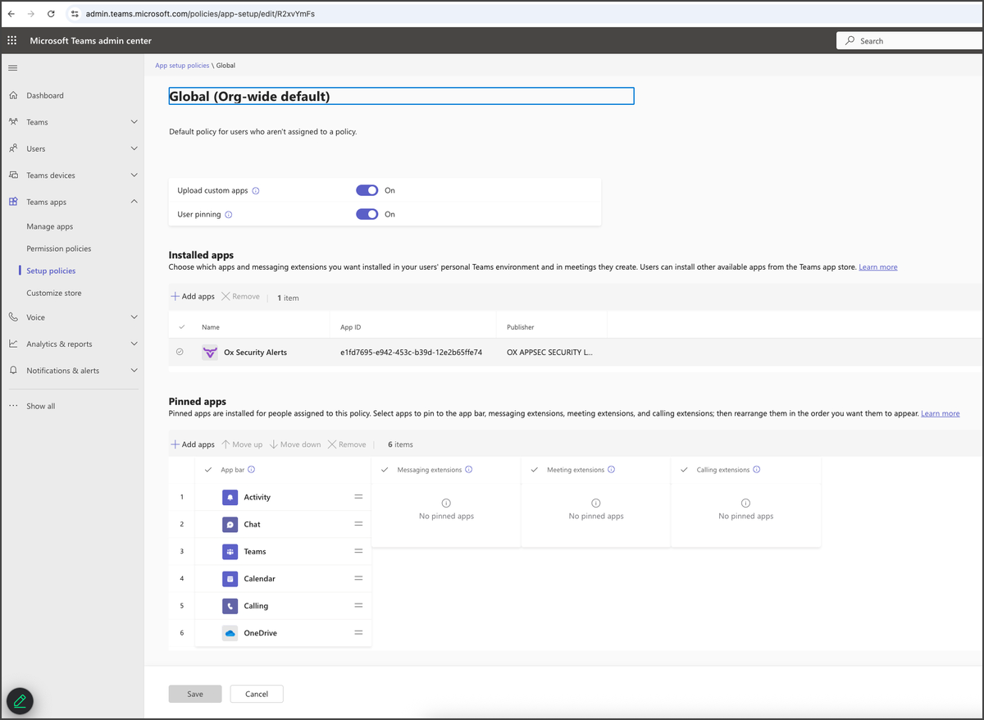
5. Go to T**eams apps > Setup policies**.
6. Create a new app setup policy or edit an existing one. For example, edit the default policy Global (Org-wide default).<br>

   <div align="left"><figure><img src="/files/zE1suOFpbK7SgKPaMibI" alt="" width="563"><figcaption></figcaption></figure></div>
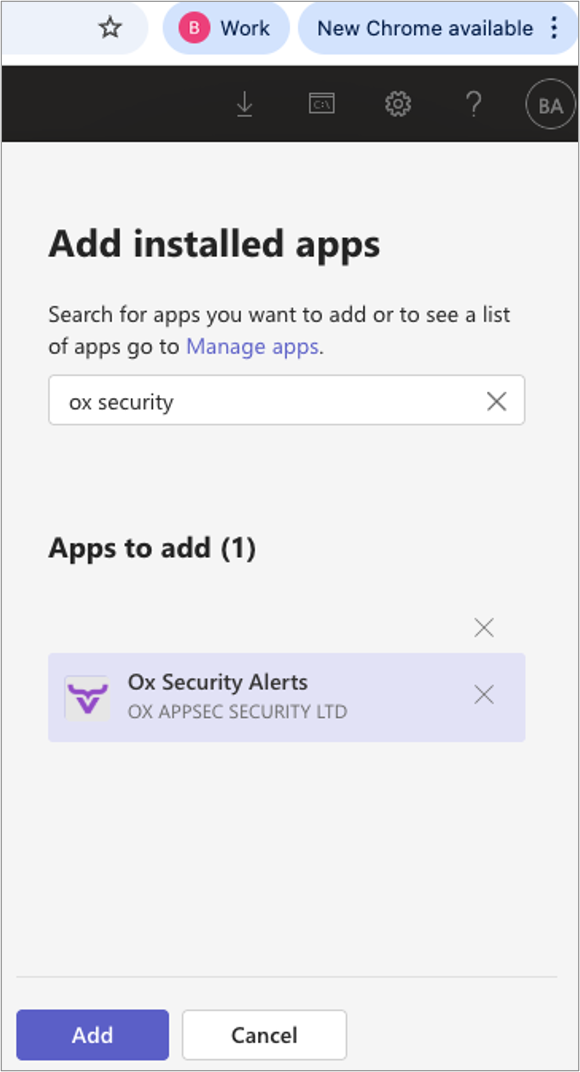
7. In **Add installed apps**, select the **OX Security Alerts** app.<br>

   <div align="left"><figure><img src="/files/nmgTrBs8DCWE23VkpapE" alt="" width="145"><figcaption></figcaption></figure></div>
8. Select **Add**. This installs the app for all users covered by the policy.

## Verify OX permissions in Microsoft Entra Admin Center

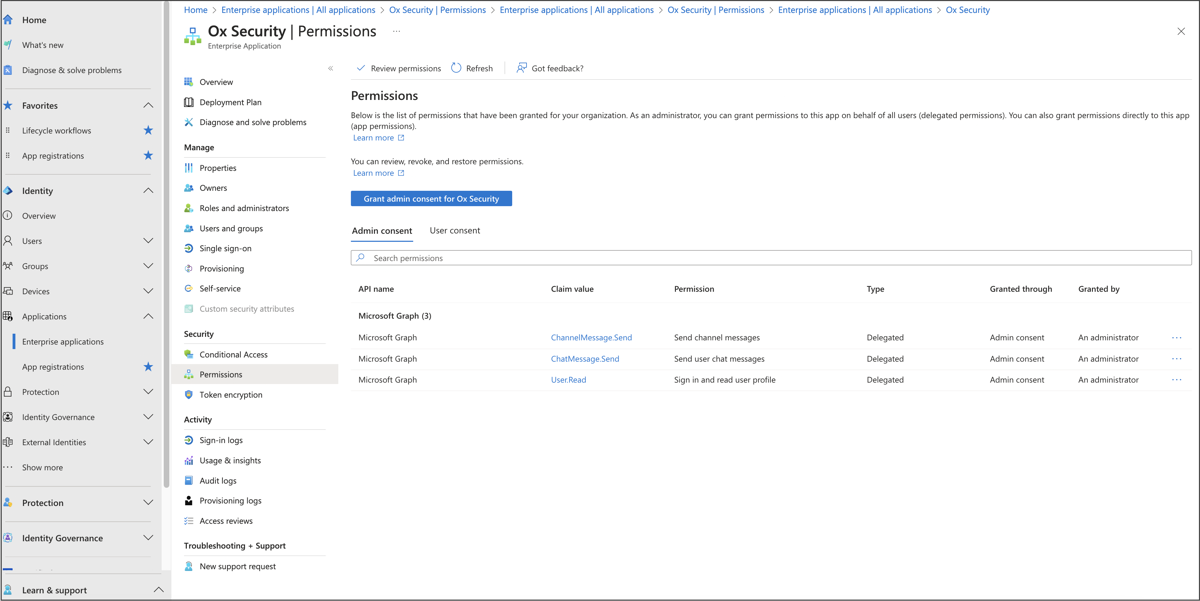
After connecting, you can view and verify the permissions granted to OX.

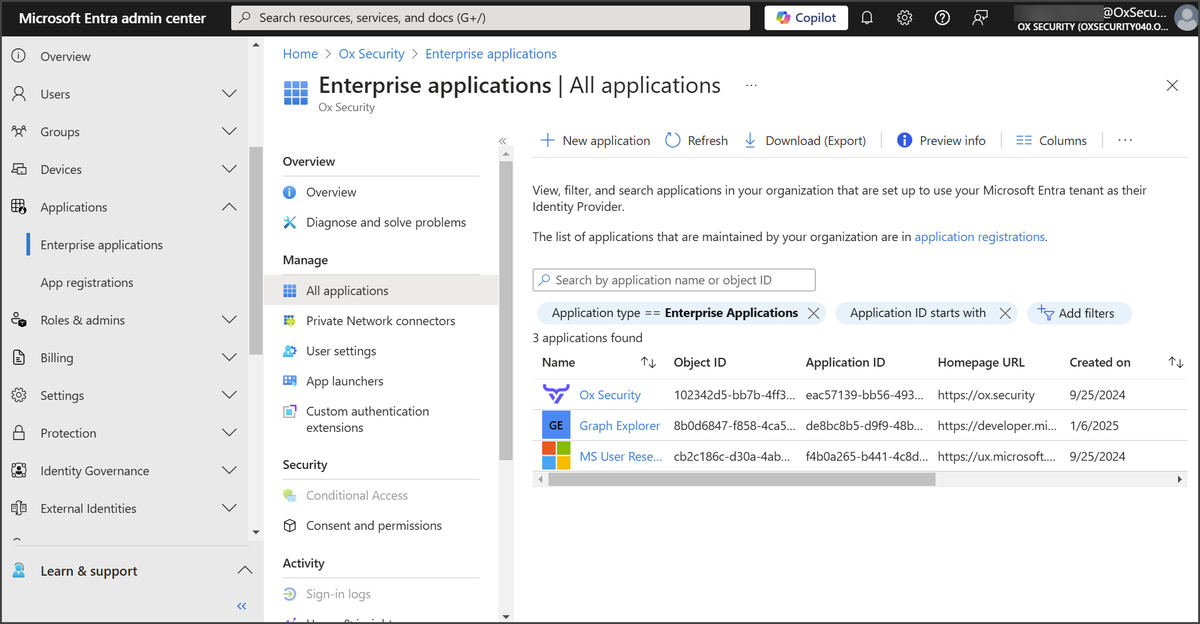
1. Go to the Microsoft Entra Admin Center, log in, and select **Applications > Enterprise Applications**.<br>

   <figure><img src="/files/4wza2aHyISjL3GhyyDQ7" alt=""><figcaption></figcaption></figure>
2. From the right pane, select **OXSecurity**. The Permissions page displays the current permissions which you can modify, if needed.<br>

   <figure><img src="/files/r5NmOlb2PGmm9MSlppl4" alt=""><figcaption></figcaption></figure>

\
Send a Teams message about an issue
-----------------------------------

1. In the OX app, go to Active Issues and select the issue.<br>

   <div align="left"><figure><img src="/files/KZZBuLI6EB5w8hzC1bLr" alt="" width="563"><figcaption></figcaption></figure></div>

   \
   You can also select the Teams icon from the bottom of the screen.\
   \
   ![](/files/G8Z0VsCTdEeypuIraHNh)<br>
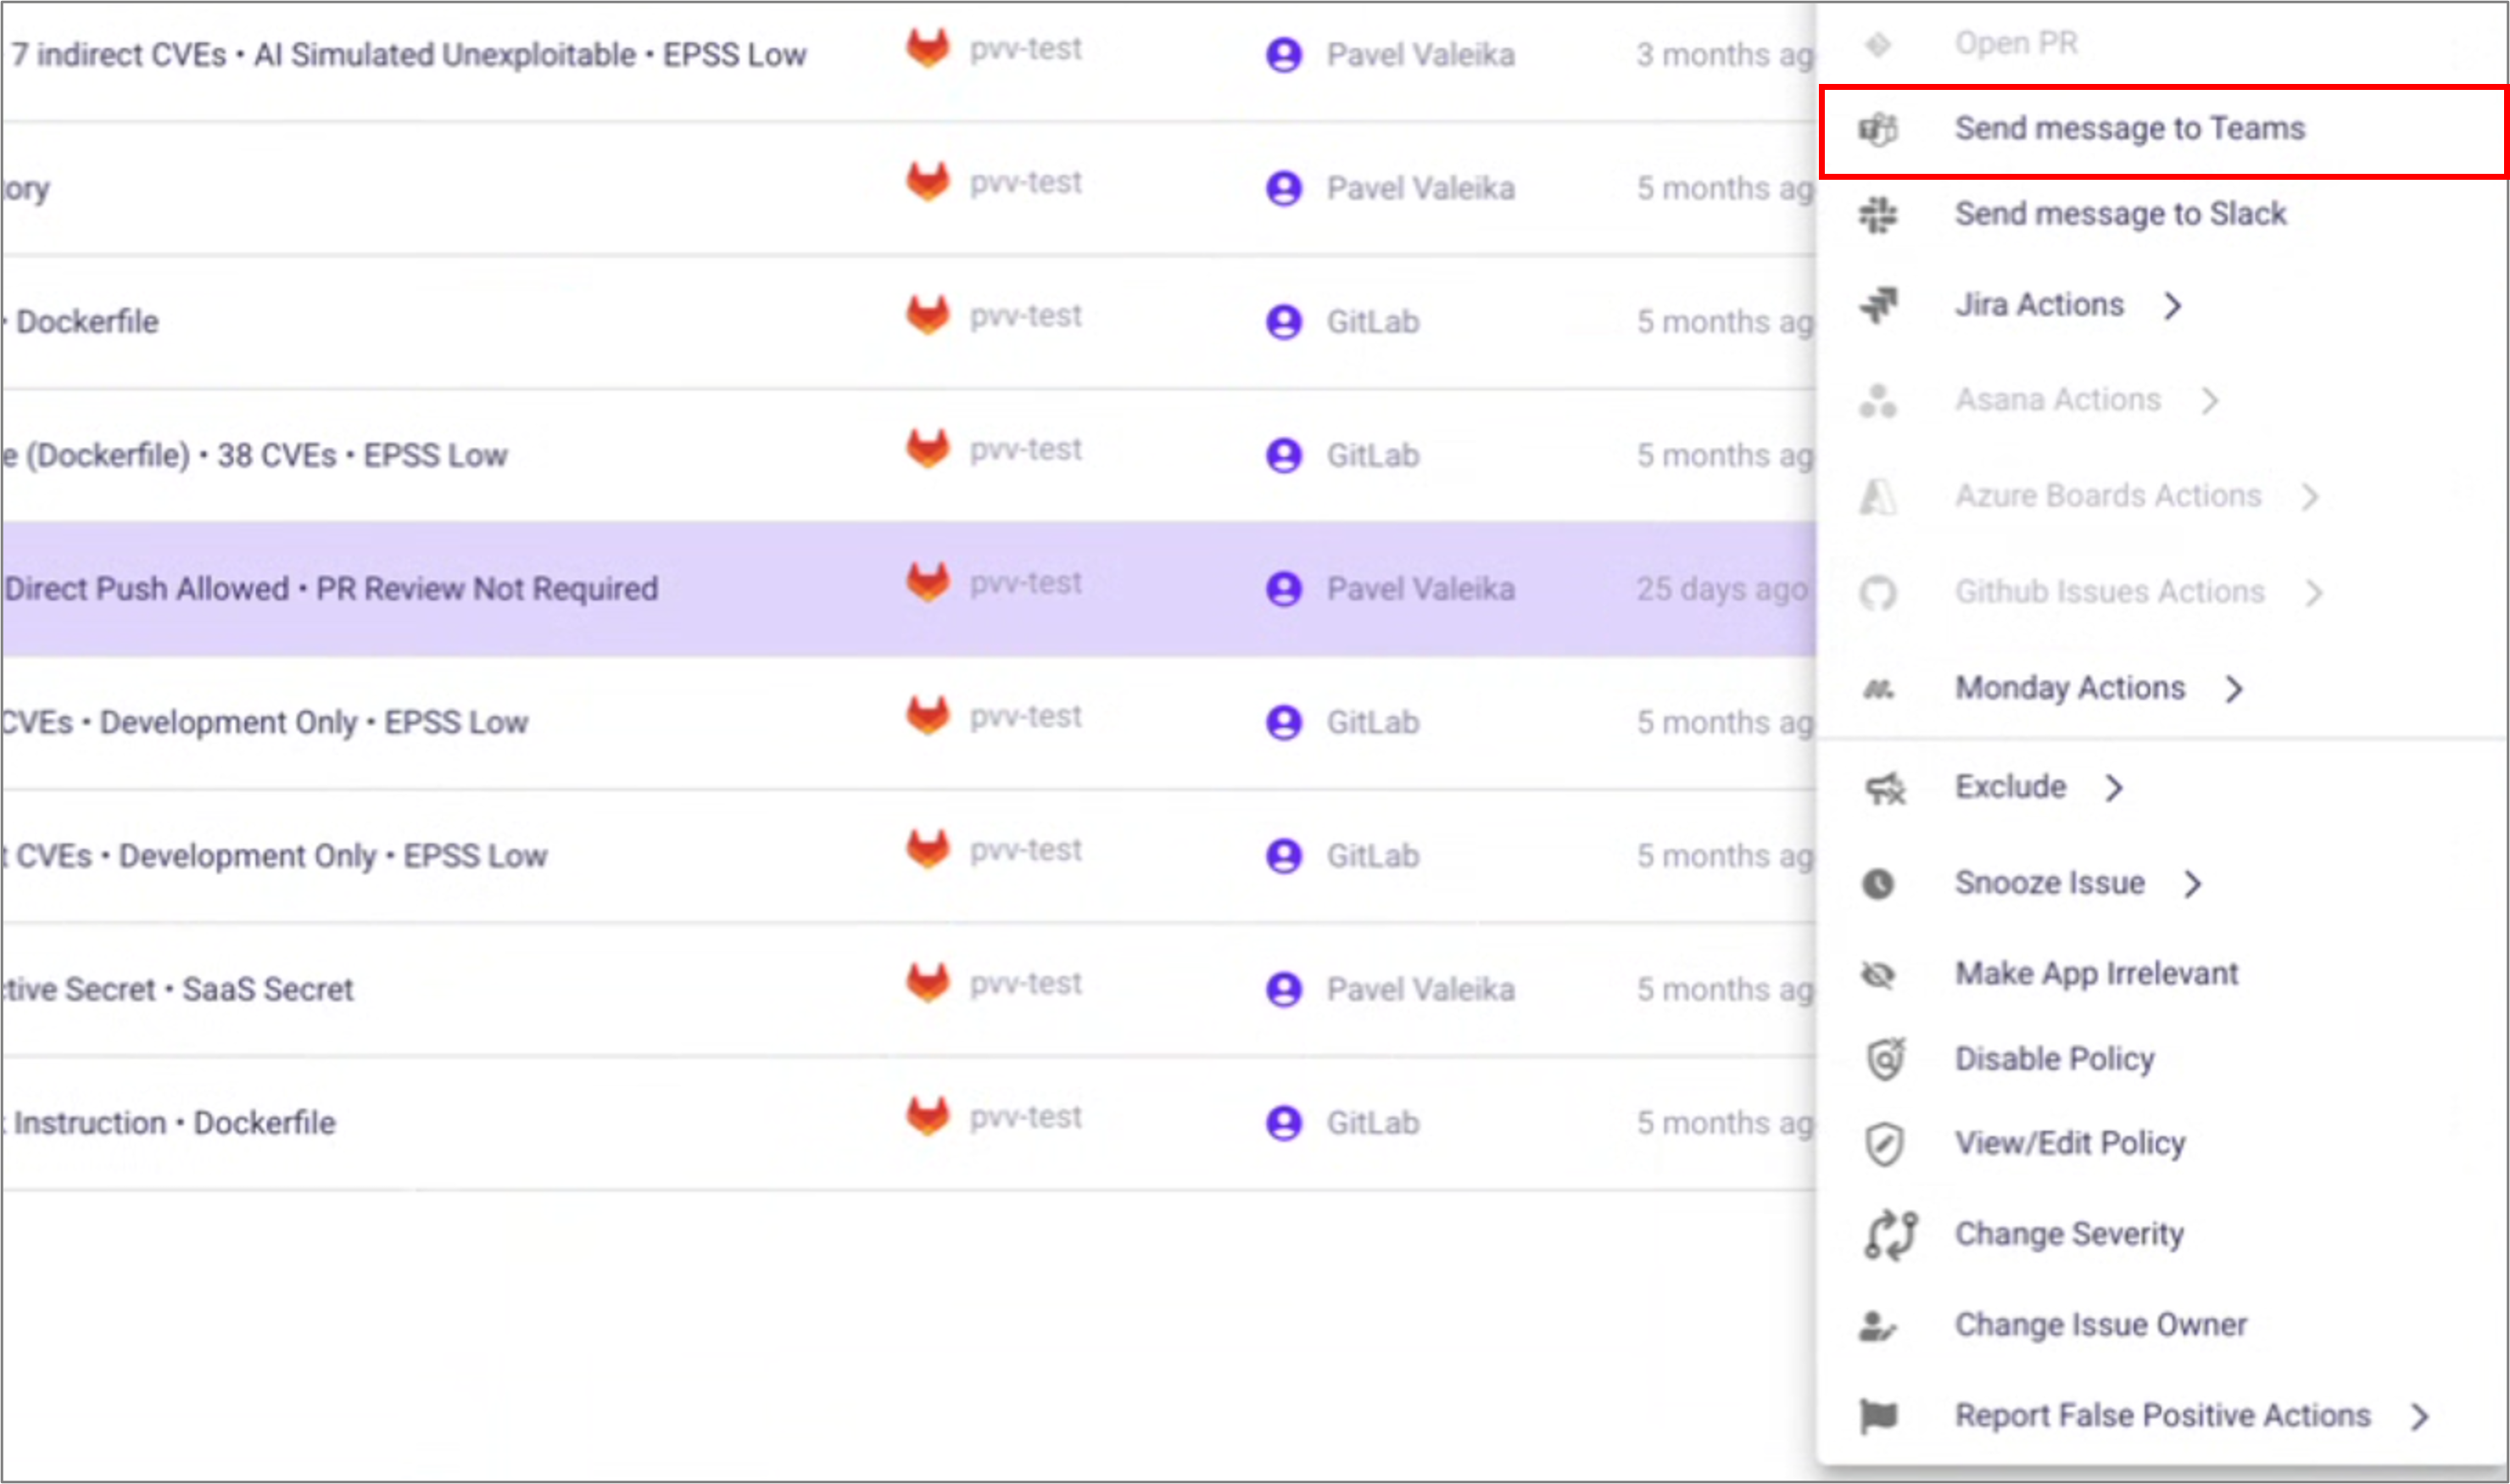
2. Right-click the 3 dots and select **Send message to Teams**.
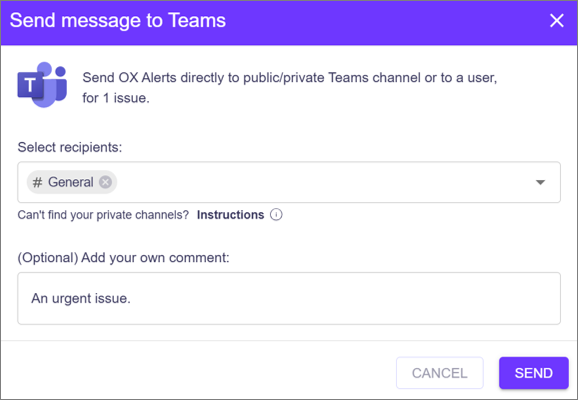
3. In **Send message to Teams,** add recipients and a comment, then select **SEND**.<br>

   <div align="left"><figure><img src="/files/1EZsxR1KaWvBCHex4rqY" alt="" width="434"><figcaption></figcaption></figure></div>

## Add a Teams messages to a workflow

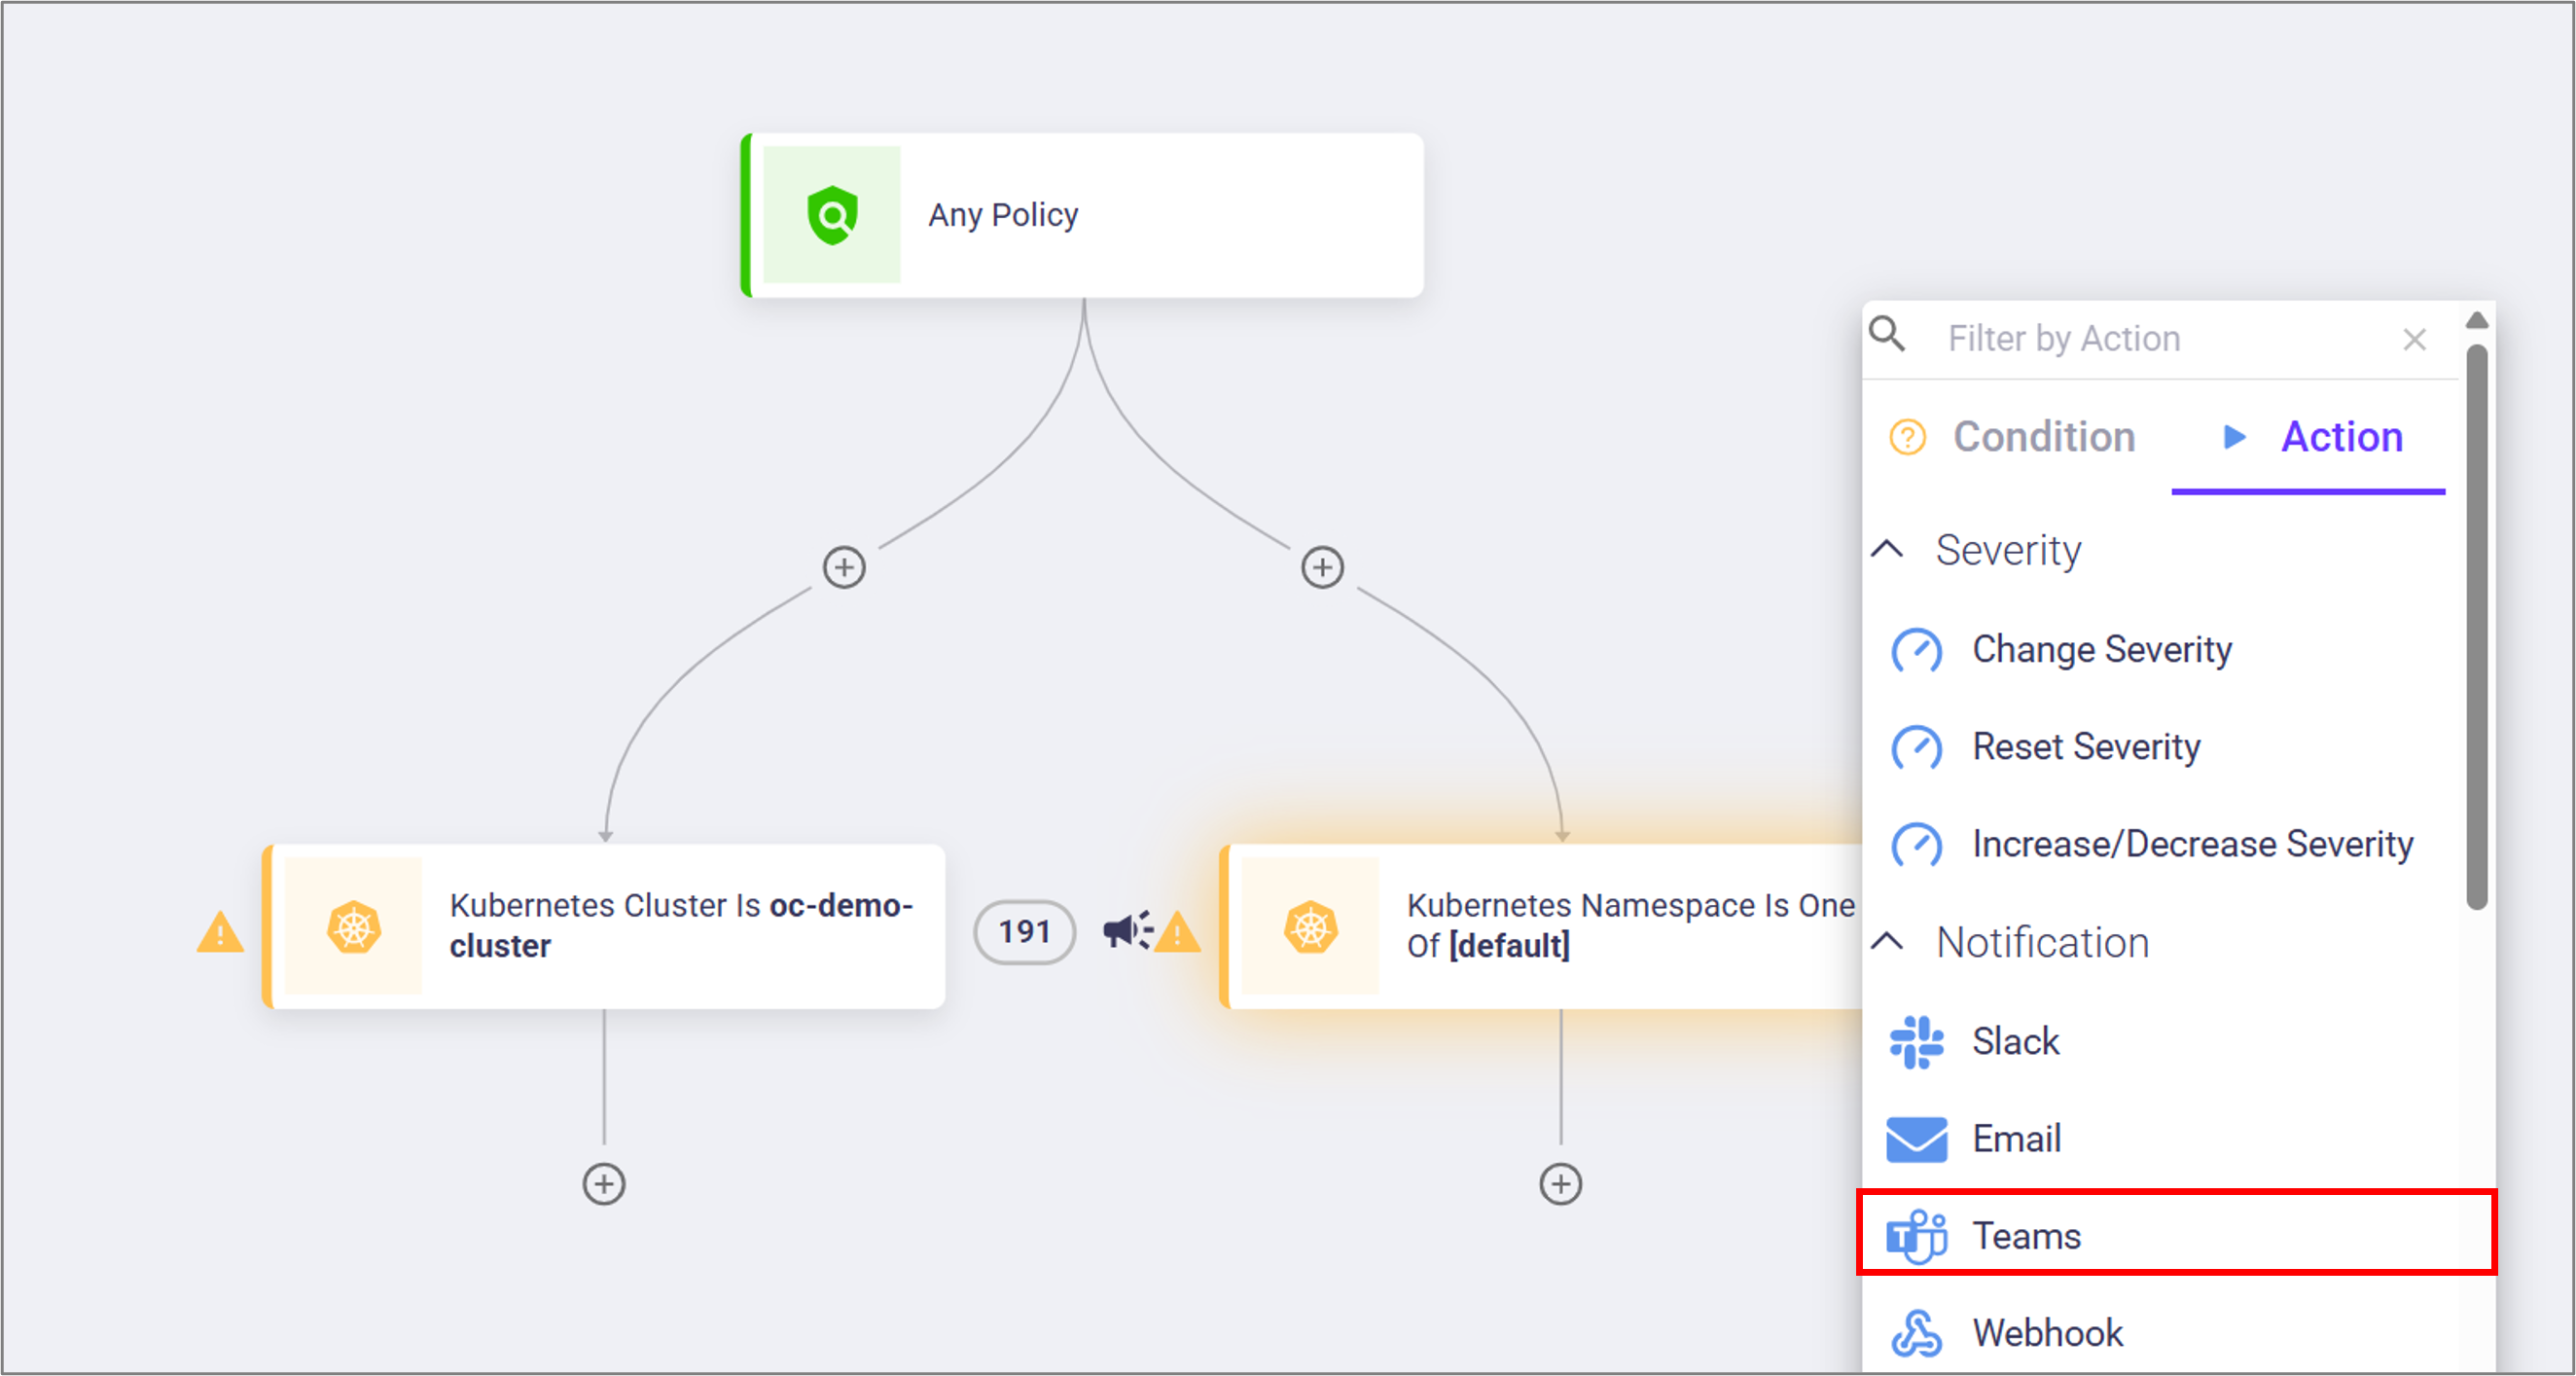
You can configure workflows to automatically send Teams notifications when specific conditions are met.

1. In the OX, go to **Workflows** and select the relevant workflow.
2. Find the workflow step where you want to add the Teams notification and select **+**
3. Select **Action > Teams**.<br>

   <div align="left"><figure><img src="/files/RbKIaKYBi9vZfOKLCyDE" alt="" width="563"><figcaption></figcaption></figure></div>
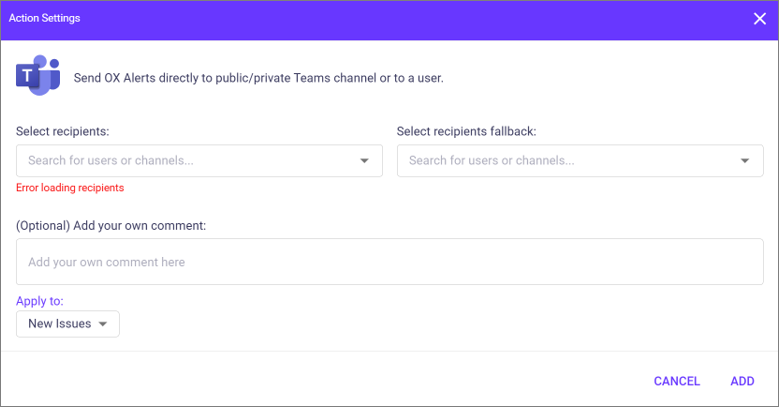
4. In **Active Settings**, complete the details in the table.<br>

   <div align="left"><figure><img src="/files/QGbA11AeleVrluKch8K8" alt="" width="563"><figcaption></figcaption></figure></div>

<table><thead><tr><th width="215.066650390625" valign="top">Item</th><th width="373.466796875" valign="top">Description</th></tr></thead><tbody><tr><td valign="top">Recipients</td><td valign="top">Required</td></tr><tr><td valign="top">Fallback recipients</td><td valign="top">Required</td></tr><tr><td valign="top">Add your own comment</td><td valign="top">Optional, but good practice.</td></tr><tr><td valign="top">Apply to</td><td valign="top">Select one of the triggers:<br>Updated Issues, New or Updated Issues, New, Updated or Existing Issues, or Periodic</td></tr></tbody></table>

5. Select **ADD**. The new Teams action appears in the workflow and triggers on the selected action.


---

# Agent Instructions: Querying This Documentation

If you need additional information that is not directly available in this page, you can query the documentation dynamically by asking a question.

Perform an HTTP GET request on the current page URL with the `ask` query parameter:

```
GET https://docs.ox.security/ticketing-and-messaging/messaging/microsoft-teams-combined.md?ask=<question>
```

The question should be specific, self-contained, and written in natural language.
The response will contain a direct answer to the question and relevant excerpts and sources from the documentation.

Use this mechanism when the answer is not explicitly present in the current page, you need clarification or additional context, or you want to retrieve related documentation sections.